
Fund Reporting Module - Import Instructions For Adding Users
This article contains instructions for Client Administrators establishing new Fund Reporting Role users and their assignments in bulk using imports.
Fund Reporting User Import
This import is used to add new Fund Reporting Role users to your Balance database.
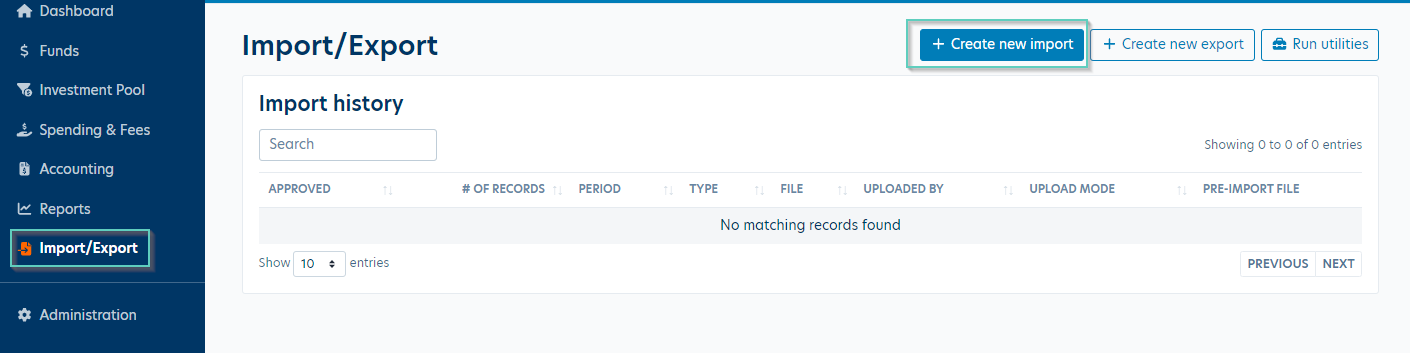
- Go to Import/Export. Click the Create new import button.
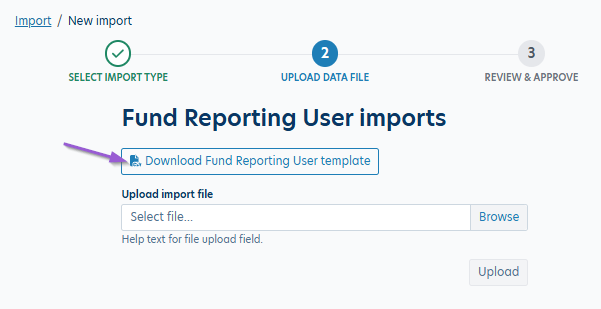
- Select the "Fund Reporting User Import" import type from the drop down and click the Continue button.
- Click the button to download the template as shown below.
- Populate columns A-E with the user information. If using SSO, please be sure the username(s) match your SSO configuration.
- Column F "Allow Access To All Funds" - enter "Yes" or "No" if the user should have access to all funds in your database.
Example template:
- Once your template is populated, use the Browse button to select your file then hit 'Upload'.
- You'll then be asked to approve the import or you will receive an error message if there are any errors in your file. You'll need to correct the file then upload it again to complete the import.
Fund Reporting User Access Import
This import is used to assign new Fund Reporting Role users to various funds or fund categories in your Balance database.
- Go to Import/Export. Click the Create new import button.
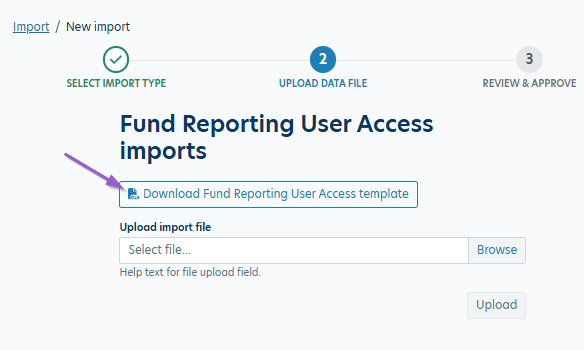
- Select the "Fund Reporting User Access Import" import type from the drop down and click the Continue button.
- Click the button to download the template as shown below.
- Populate Column A with the username (exactly as it appears in your database) of the user(s) you want to assign access to.
- Column B "Field ID" should be populated with single digit between 0-3. These numbers will align with the fields shown under the user profile when assigning funds to fund reporting role users manually.
0 = Individual Fund - use this to assign specific funds to the user(s).
1 = Department/Administrator field
2 = Campuses field
3 = User Category 1 field
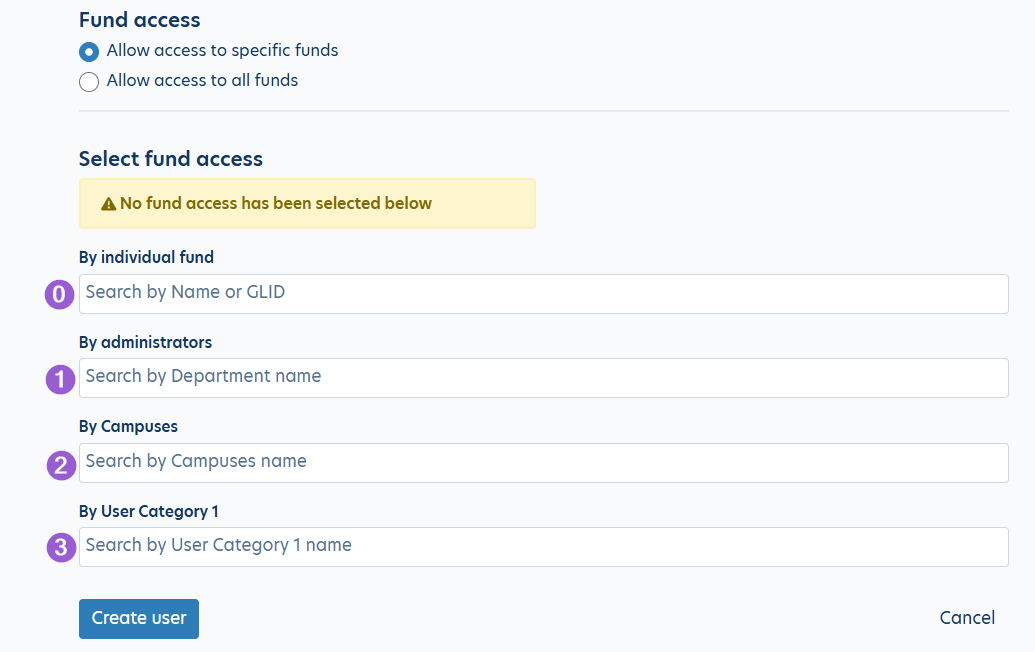
Note: Department, Campuses, and User Category 1 are all fields that can be relabeled. You may see different field labels than what the above screenshot is showing. If you're unsure which field is which, please check under Administration > Manage Custom Labels to view your custom field labels.
These fields will also appear in order across the top of the Funds page as shown below: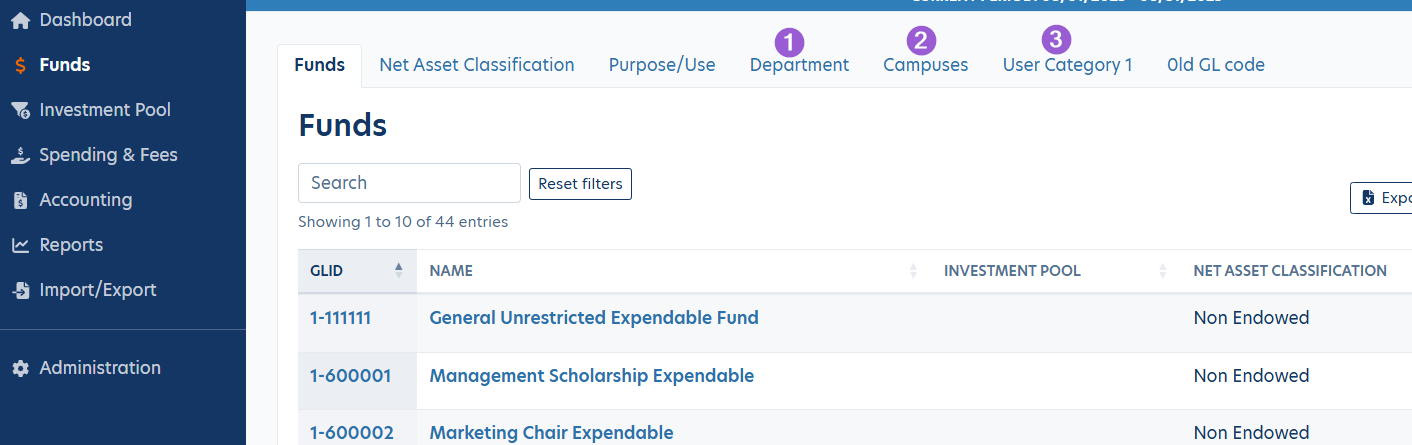
Column C "Field Value" will be based on the chosen Field ID in Column B.
If you entered 0 for an individual fund, you'll enter the GLID in this cell. You'll need to create additional rows for each individual fund you're assigning to a user.
If you entered 1-3 for Department/Administrator, Campuses, or User Category 1, you'll enter the name of the item in the respective category exactly as it appears in your database.
You can view available items by navigating to Funds, then clicking on the tab for the field in question. All items will be listed in the table and you can click the "Add new" button to create new items. You can also use the Edit and Delete buttons to clean up the list as needed.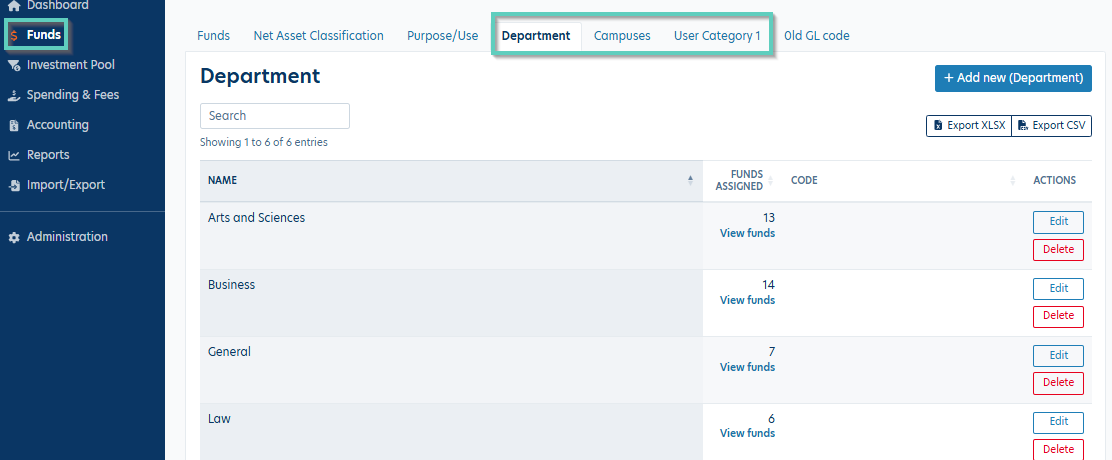
You'll need a separate row for each item/GLID to be assigned.
Example Template: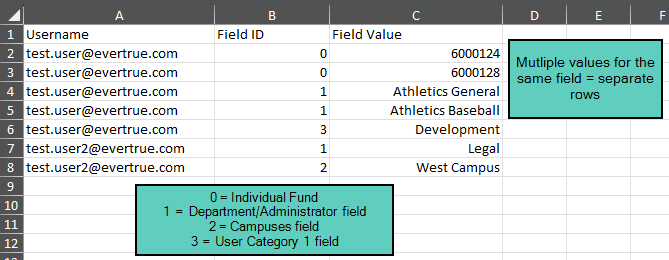
- Once your template is populated, use the Browse button to select your file then hit 'Upload'.
- You'll then be asked to approve the import or receive an error message if there are any errors in your file. You'll need to correct the file then upload it again to complete the import.
To create new Fund Reporting Role users and assignments manually, please see: Adding a New Fund Reporting Role User
Reply
Content aside
- 9 mths agoLast active
- 94Views
-
1
Following