
Fund Reporting Module - Client Administrator Guide
The Fund Reporting Module is replacing the original Department Site. These users will now access your database using the same link as you instead of accessing a completely separate site, but their views and permissions will be different.
If you'd like to implement this module in your database, please contact support.balance@evertrue.com.
Fund Reporting User Maintenance
Your Fund Reporting users will be included in your database user list and no longer housed in a separate location. These users will specifically be assigned to the "Fund Reporting" user role.
Add User
These instructions are for adding new users and assignments manually in your database. To add multiple new users and assignments in bulk, please see Fund Reporting Module - Import Instructions For Adding Users
Navigate to Administration on the left side panel in your database. Then click "Manage users".

- Click on the Create New User button (top right corner of the page).

- Fill out Username, Email address, First name, Last name, and create a password.
Note: If your organization uses Single Sign-On (SSO), you will need to ensure that the username you've created matches the naming convention of your SSO setup. Typically, this is an email address, but sometimes can be a different format. Reach out to your IT team or check your current users' usernames if you need help determining what the username should be.
You will need to create a password as well, but the user does not actually need it to log in via SSO.
- Select 'Fund Reporting' as the User Type.

- Welcome Email - Newly added users will receive an automated welcome email with instructions and the website link to login if you leave this option checked when setting up a new user.
- A new section will populate when you choose Fund Reporting. Use these fields to assign the user to specific funds, departments, administrators, etc. Your fields may have custom labels, so this screenshot may look a bit different than your view.
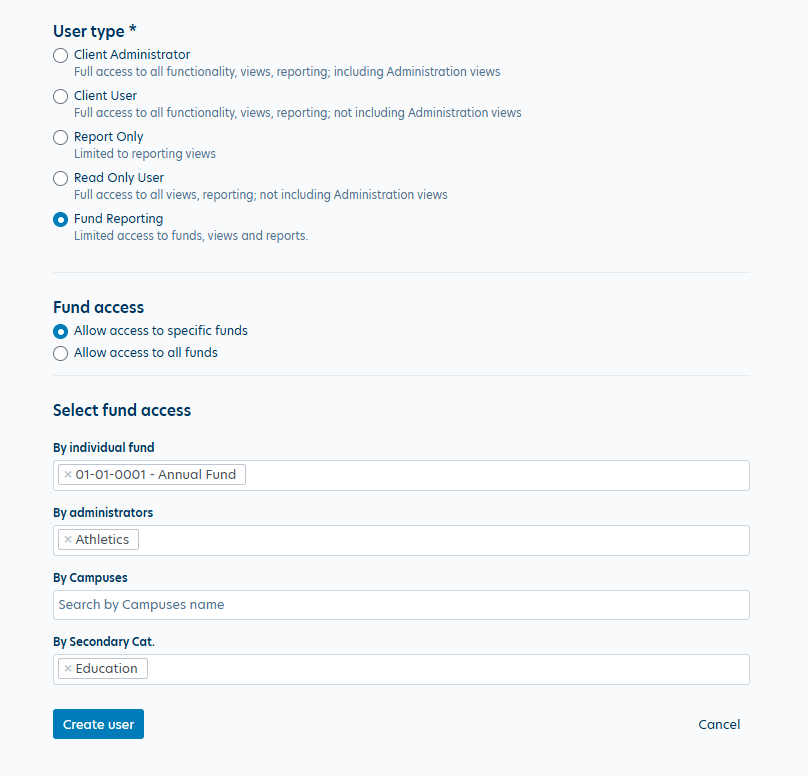
Note: These selections are additive meaning assigning additional items expands user access and does not filter out funds. Users will have access to every fund that applies to any of the items selected, not just funds that apply to all. - Click 'Create User' to save the new user information.
Disable User
- Go to Administration in the left hand column.
- Click on 'Manage Users'.
- Click on the user you want to disable.
- Use the 'User disabled' toggle to disable the user and hit 'Save Changes' once you're done.
Impersonate User
Client Administrators can impersonate a Fund Reporting user to see their specific view and double check that their fund assignments are correct.
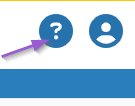
Click on the person icon in the top right corner of any page and select 'Impersonate fund reporting user'. Then select the user you'd like to check on.

You'll notice a bright yellow border around your page and a yellow notice at the top letting you know which user's view you're seeing. Click 'Stop impersonating' to go back to your usual view.

Note: When impersonating a user, reports will not populate data at this time, only titles and headers. The good news is that your Fund Reporting role users will see the actual data when they run reports themselves. We are working on updating this to show the report data while impersonating users.
Fund Reporting User Views
Dashboard
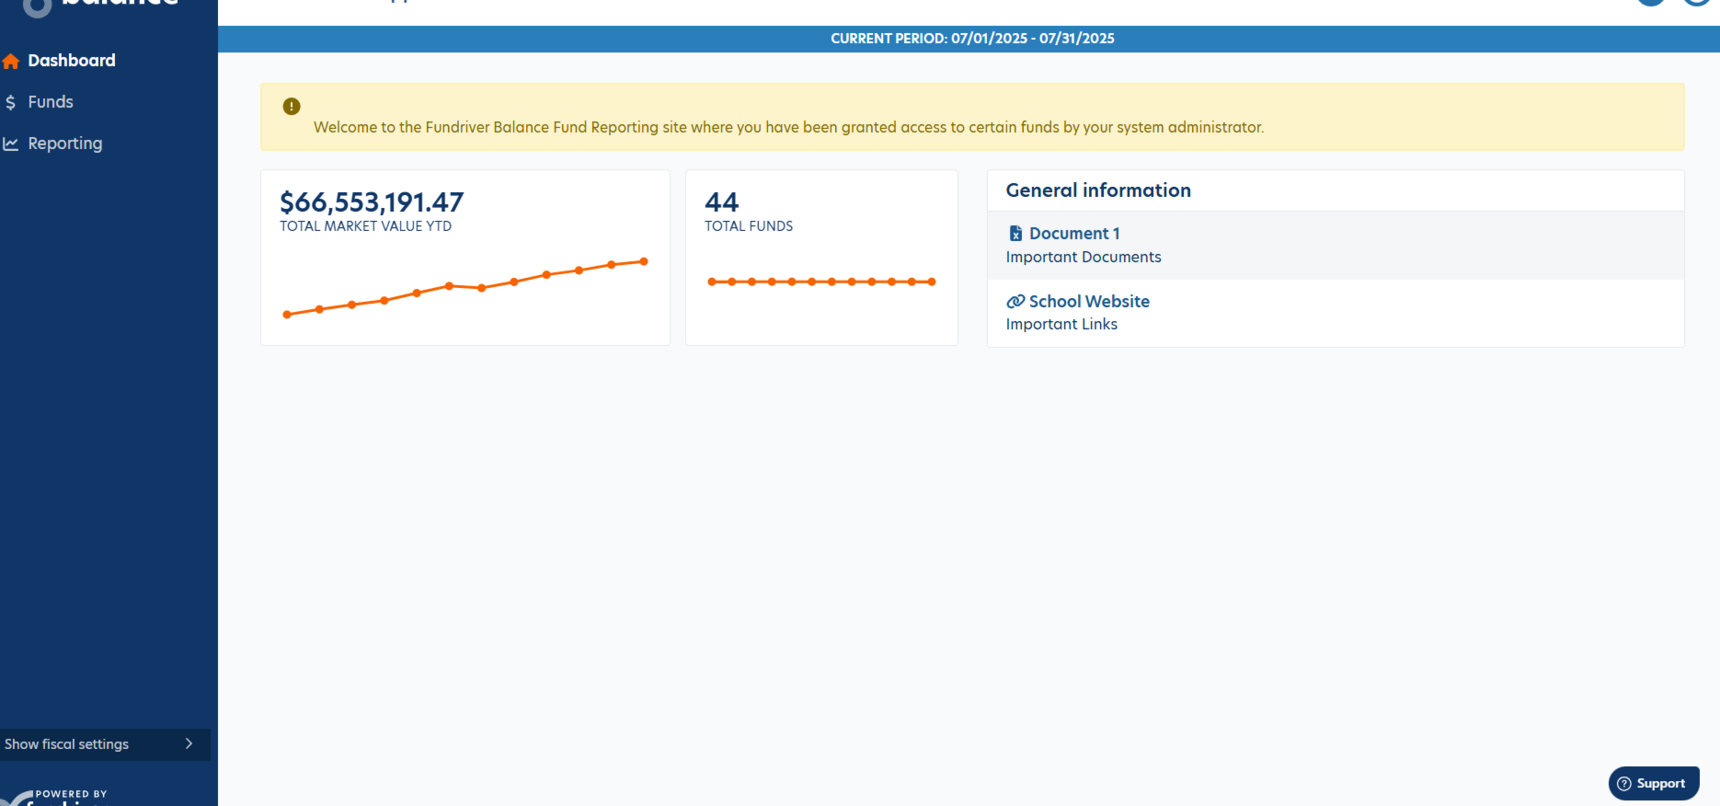
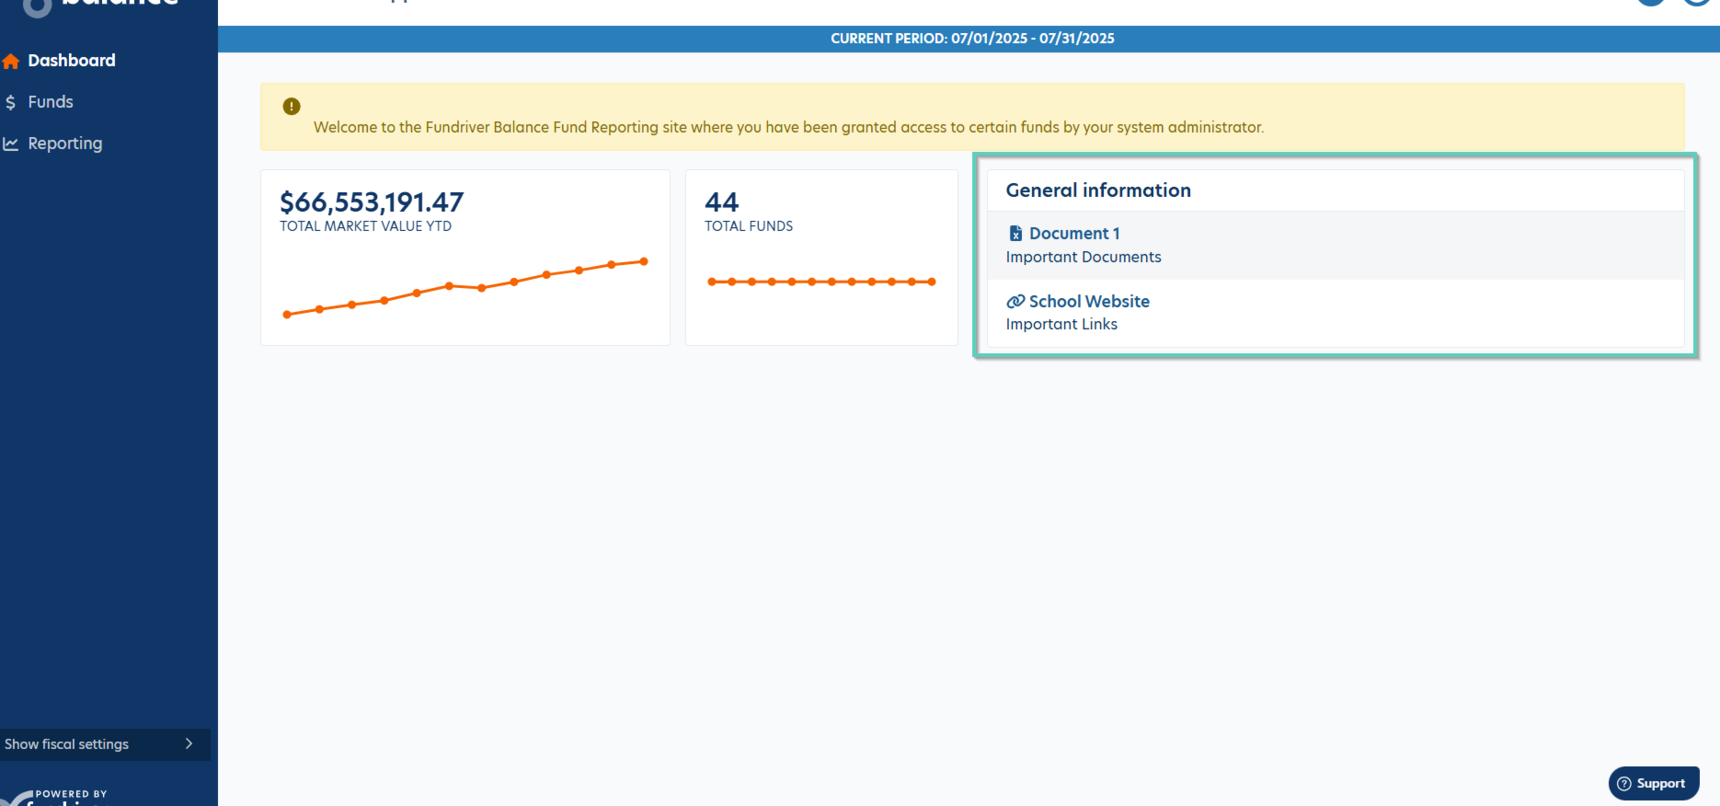
Upon logging into Balance, users will be brought to the Dashboard page. On the Dashboard, they'll see several items
- Homepage message from the database administrator in yellow.
- Graphs showing total market value YTD along with the total number of funds in the database that they are assigned to.
- General Information - customizable section that can include documents and links for users.
Funds Page
Users can click on 'Funds' on the left side navigational panel to view the Funds page. Here they'll see all Endowment and Expendable (if your organization is tracking these) funds in the database that they are assigned to. They can click on the Expendable funds tab across the top of the page to view Expendable funds.
Users can click on the first 2 columns of any fund (GLID and Fund Name) to view more data.

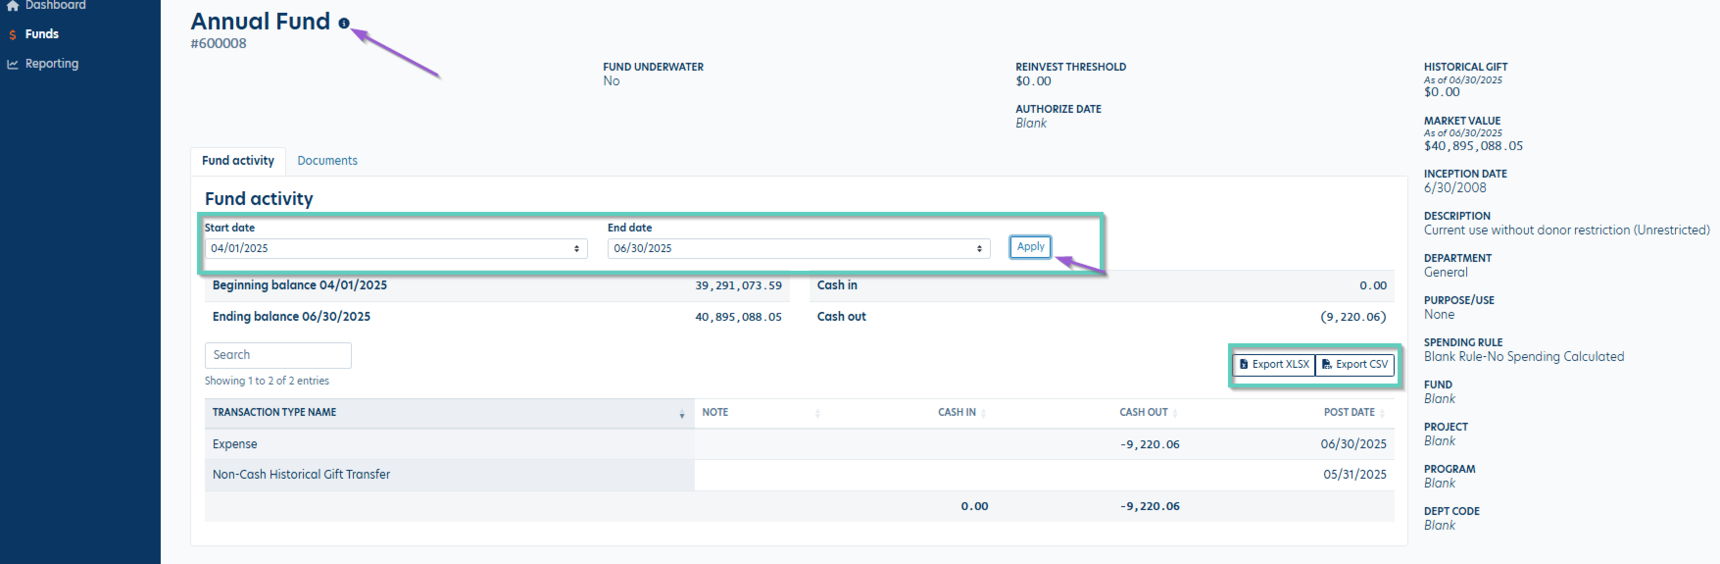
When they click into a fund, they'll see various details including inception date, fund descriptions, fund activity, and documents attached to funds. As an administrator, you can customize which fund profile fields populate for these users.
For Endowment funds, they'll also see current values, spending thresholds, and various other Fund Profile fields.
Users can select a Start and End date from the dropdowns and click 'Apply' to view the Fund activity for the periods they need to see. They can use the Export buttons to export this data into an XLSX or CSV file.
Users can click on the blue info icon next to the fund name to see the Purpose Description field.
Users can click on the Documents tab to view all documents attached to a fund.

Reporting
Fund Reporting users can click on 'Reporting' on the left side navigational panel to view the Reports page. All reports available to them will be listed in various folders on this page. Clicking anywhere within the folder name will expand it and they'll be able to view all reports within that folder.

To run a report, users will click on the report name, then choose a Start/End Dates and/or Post Date and apply any other grouping or filtering parameters they'd like.

Then users will click the 'Run Report' button to view the actual report. A new tab will open with the report, so they may need to check their pop-up blocker settings if they don't see a report window open. They can use the buttons across the top panel to view different pages and search within the report. Users can then click the floppy disk icon to export the report as a PDF, Excel file, or Word file.

Users can edit and create your own report filters using the Manage Filters feature. Check out this article for more info and instructions: Manage Filters Feature
Manage Fund Role Access
Go to Administration and select "Manage Fund Role Access".
Access by Attribute
This page shows various Fund Role user assignments and audit related data. You can click onto any of the items in the Value column to view more details. You can also export this table into Excel or CSV format.

User Reports
Here is where you can choose which reports will be available for Fund Reporting users and set reporting date ranges if desired.
- Click 'Set report dates" button on the right side of the page to set start and end date limitations for your Fund Reporting users. Example: If you only want your Fund Reporting users to generate reports based on your current fiscal year, you would select the Starting Period as your first period of the fiscal year and leave the Ending Period blank. Each fiscal year you then would need to update the Starting Period on this screen to update the dates for the Fund Reporting users' reports.
- Use the toggle next to each report to allow or prevent them from being run by Fund Reporting users.

Fund administrator maintenance
This page has options to reset all or only unassigned fund Administrators to match the current Department assignments. If you're unsure what this means, see the Administrator/Department Relationship section of this article.

If you want to assign users based on Department, the Administrator field must be the same as Department. If these are not identical, no funds will show up for the users assigned by Departments.
When initially setting up your Fund Reporting users, you will want to Reset All Funds Administrator with Current Department. Some customers may have GLIDs that may have more than one Fund Administrator. If so, you will manually have to update those GLIDs individually on the Fund Profile page.
If you have already made manual updates to the Fund Administrator for certain GLIDs to assign multiple Administrators, you will not want to “Reset All Funds Administrator with Current Department” again or your manual changes will be cleared out and reset to a 1 for 1 relationship. If you have added new GLIDs and wants to set the Fund Administrator if it wasn’t done when creating the new GLIDs on the Fund Profile page, you can use the “Set All Funds missing Administrator with Current Department” option.
Manage Access Settings
Click the 'Manage access settings" button on the Manage fund role access screen.

Here you can customize your homepage message and General Information section, designate contact persons for Fund Reporting users who need support, adjust document visibility.
Dashboard tab
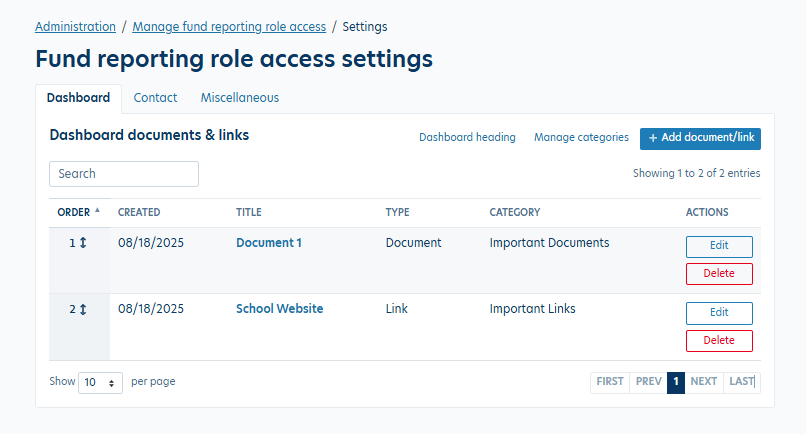
This tab allows you to customize the General Information section on the Dashboard for fund reporting role users.
Click 'Dashboard heading' to change the name of this section
Click 'Add document/link' to add new documents and links to this section. These docs and links will be assigned to a category, similar to documents and notes attached to funds. These items will all use the same set of categories, so you can choose an existing category or click 'Manage categories' to add more or edit existing ones.
Items in this section can be edited or deleted by using the buttons under Actions.
This section will appear as shown below for fund reporting role users:
Contact tab
You will need to determine who the main point of contact will be at your organization for your Fund Reporting users, should they have questions on using Balance or any of the funds that are assigned to them. Enter this info into the 'Department user contact information' section. You can check the boxes to show or hide the email address and phone number for the contact person as desired. We recommend having at least one of these fields show so that users can easily get assistance.
The Homepage message can also be updated on this page.
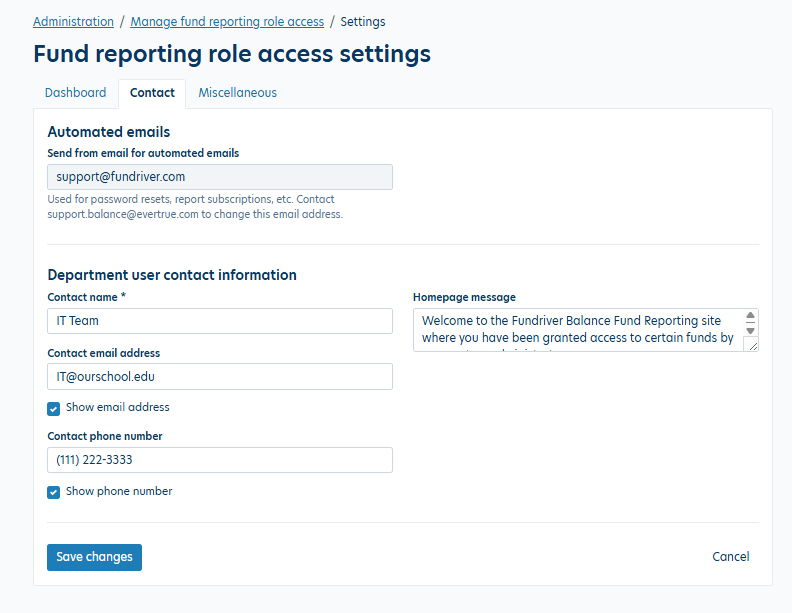
The Homepage message will appear in the yellow box on the Dashboard page. The contact information will appear on the support modal that only is viewable by fund reporting role users. They can access this support modal using the question mark icon next to the settings icon in the top right corner of the page (only visible to fund reporting role users).
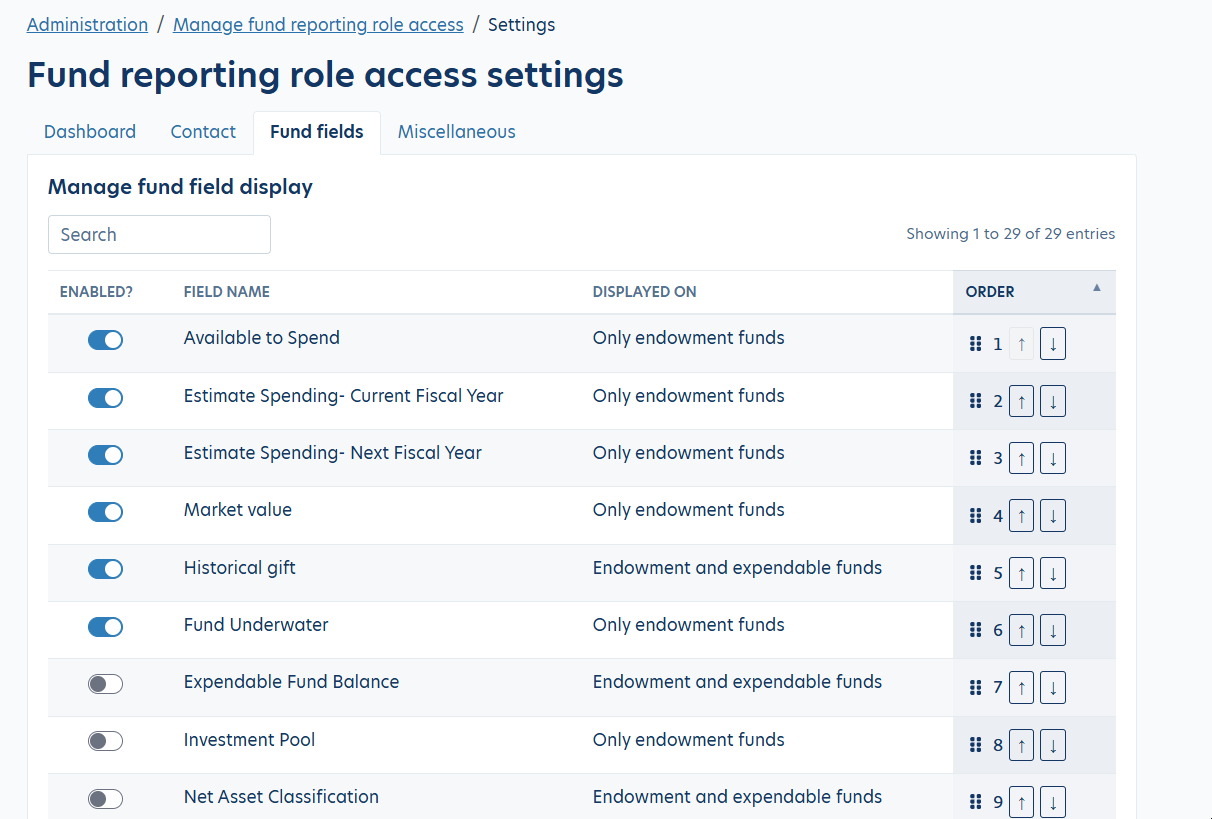
Fund Fields tab
This tab allows administrators to choose which fund profile fields are visible to fund reporting users. Click the toggle next to each field to enable or disable the field: Blue = enabled, Gray = hidden. You can also reorder these fields by dragging and dropping within the Order column, or using the arrow buttons.
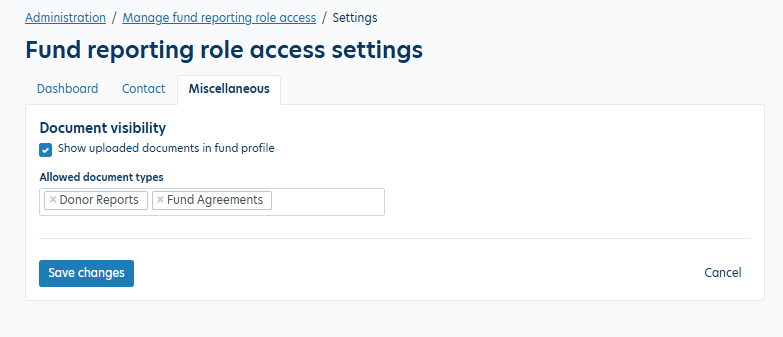
Miscellaneous tab
Under Document visibility, if you have uploaded documents to individual GLIDs in Balance, you can decide whether you want those documents to be available to the Fund Reporting users to view or not. If you select the box to “Show uploaded documents in fund profile, “ you can also choose which categories of documents they can view.
Administrator/Department Relationship
The Administrator field is essentially an extension of the Department field that is used for the Fund Reporting Role. In Balance, each fund is required to be assigned to only one Department. You can then add additional Department assignments in the Administrator field.
Your organization may have renamed the Department field, but it will be the 4th tab on the Funds page. The items listed on this page are all of the options available for both the Department and Administrator fields. Click the 'Add new' button to add more items as needed.

If you want to assign users based on the Department field, the Administrator field must include the option selected in the Department. You can then add additional Administrator options by clicking into the field and selecting the appropriate options.

We have options to set Administrators automatically, see the Fund administrator maintenance section of this article for more info.
Reply
Content aside
- 1 yr agoLast active
- 424Views
-
1
Following