
Assigning Fee Rules in Bulk
This article explains how to use the Fund Fee Rules import to assign or unassign multiple funds to fee rules at once.
Downloading the Import Template
- Navigate to Import/Export on the left side panel in your database.
- Select 'Create new import' button towards the top right corner of the page.
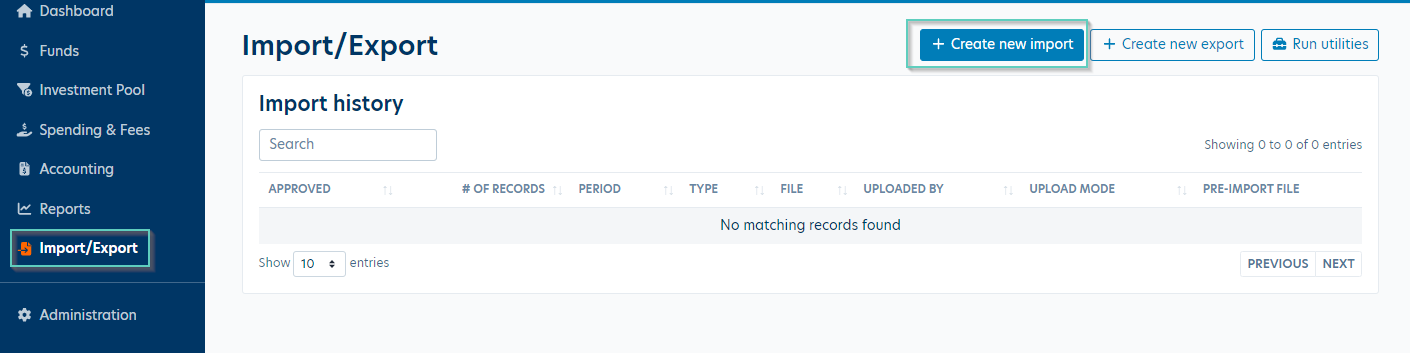
- Select 'Fund Fee Rules' import type from the dropdown then hit Continue.
- Download the template for the import by clicking the 'Download Fund Fee Rule template' button.
Populating the Import Template
You'll now need to populate the import template with the funds and fee rule assignments you'd like to update.
- GLID (Column A on the import template template) is required, but the Name (Column B) is optional.
- Fee Rule (Column C) is required and will need to match the name of the fee rule in your database exactly. You can view current fee rules under Spending & Fees > Fee rules.
- Action (Column D) will be either 'Add' or 'Remove'. You can use the same import file to add and remove fee rule assignments from your funds.
Example Import Files:
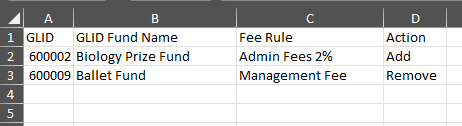
In this example, GLID 600002/Biology Prize Fund will be assigned to the 'Admin Fees 2%' fee rule and the GLID 600009/Ballet Fund will be unassigned from the 'Management Fee' fee rule.

In this example, GLID 600011/Law Library and GLID 600013/Book Fund will both be unassigned from the 'Management Fee' fee rule and assigned to the 'Admin Fees 2%' fee rule.
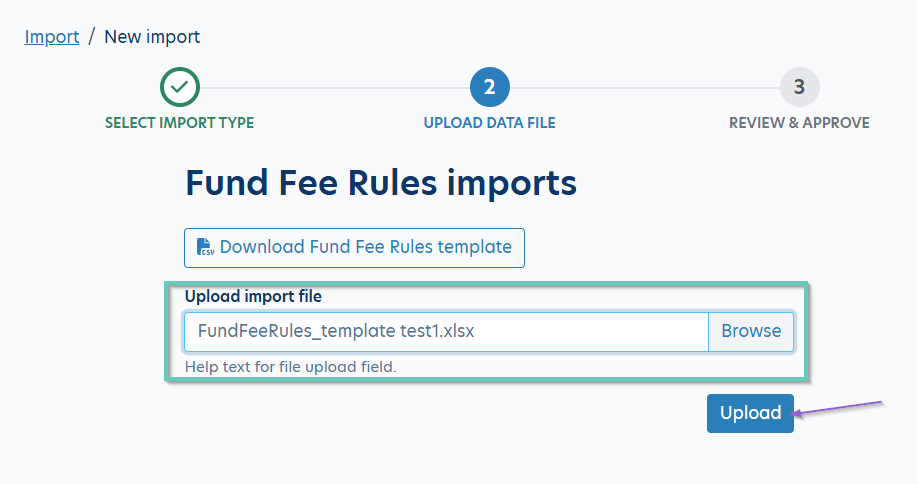
Uploading the File
Once you've completed your template, save locally and use the Browse button to select the file to be uploaded. Once the file has been selected, click on Upload to bring that file into Balance.
Your changes will appear in a view only table. Click Approve Import to commit your additions/updates. A second box will pop-up to confirm you want to approve the import, click 'Yes. approve import' to continue.
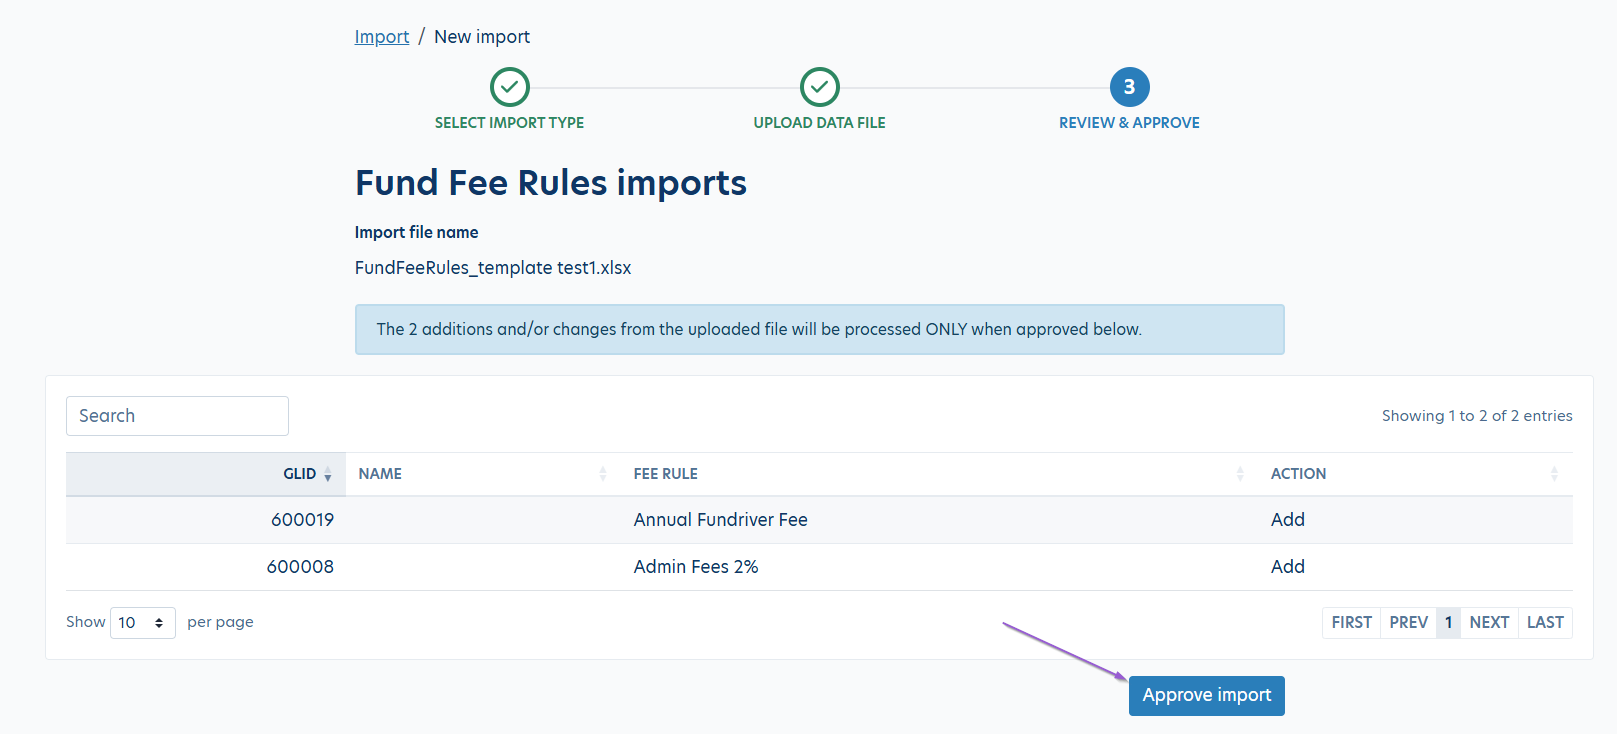
You'll then get a green message indicating that the funds have been updated.
Once your file has been successfully uploaded, it will appear in your Import history. You can view this by navigating back to the Import/Export page on the left panel in your database.
Error Messages
Any errors in your file will generate an error message and be shown in a table. You can Download the error list and click Show/Hide rows to see the error details.
The user will have to fix these errors and upload the file again. You may need to edit the names of your fee rules, or double check that the Action you've entered on the template is valid. The Import only processes when there are no errors as it is committing the entire file.
Once the errors have been corrected and the file has been saved, hit Upload corrected file to reupload.
Reply
Content aside
- 1 yr agoLast active
- 113Views
-
1
Following